Getting Started
Getting this working is simple — you only need to do two things:
- Create an intranet penetration rule in the console .
- Run
trannapon your local device.
The steps below walk through the console and the local side in order. Follow them one by one and you’ll be up and running in minutes.
Console setup
Open the console
You’ll find the console entry at the top-right of the website: Console . You’ll need a free account — usually just an email address that can receive mail.
Create a device
Create a device for your home computer under Devices → Add device — for example, name it “Home Server” and click Create.
Copy the device token
You’ll see the new device. Click the “Copy Token” icon to copy the token to your clipboard. Keep it safe; you’ll need it in the next step.

Create an HTTP(S) penetration
Create a penetration for your web page under HTTP(S) Penetration → Add penetration. The form fields are:
- Name: A friendly name, e.g. “My Page”.
- Free Domain: Pick an available free domain from the dropdown.
- Device: Select the “Home Server” device you just created.
- Local Host: Leave the default localhost.
- Local Port: The port your local web server listens on, e.g. 80.
Like this: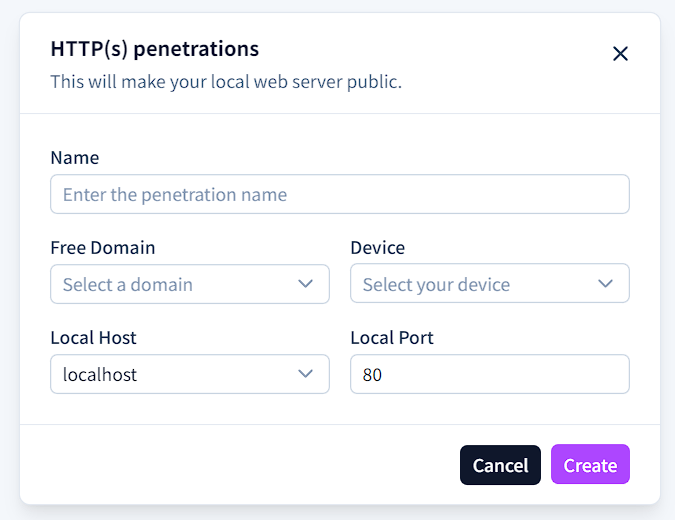
After clicking Create, your HTTP(S) penetration is ready. Open its details to find the TLS-enabled access address: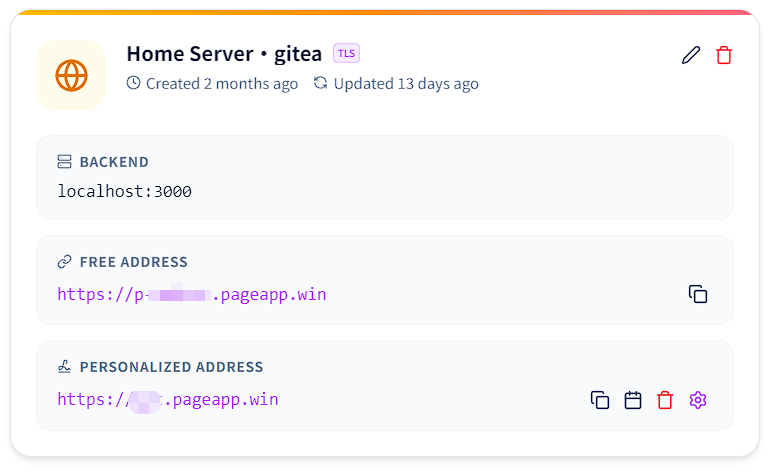
You’ll see the FREE ADDRESS for reaching your home page from anywhere, e.g. https://p-xxxxxx.pageapp.win . It won’t work yet — there’s one last step.
Run locally
This part is easy, but has a couple of prerequisites.
Requirements
- The
trannapbinary, delivered as a.ziparchive whose name depends on your OS and architecture (for exampletrannap-v3.0.2-linux-arm64.zip). Extract it first to get the binary. - Basic command-line access on your operating system (some steps require permissions).
Run TranNAP
Extract the downloaded archive, switch to the folder containing the trannap binary, then run the command below.
YOUR_DEVICE_TOKEN with the token you copied earlier (see
Copy the device token
). The archive name differs per platform and architecture — for instance trannap-v3.0.2-linux-arm64.zip on Linux or trannap-v3.0.2-darwin-arm64.zip on macOS — so use the actual file you downloaded.TranNAP will connect to the service automatically and wait until the connection succeeds.